

A few essential products build a natural makeup look, guided by one main rule: prioritize your skin’s texture over color correction. The kit typically includes a tinted moisturizer or skin tint, spot concealer, cream or liquid blush, brow gel, a single coat of mascara, and a tinted lip oil or balm.
The method is simple: prep your skin, select formulas that behave like skin instead of sitting on top, apply with fingertips or a damp sponge, and conceal only where coverage is needed. That’s the whole approach.
Here is the starting list:
- Tinted moisturizer or skin tint (a sheer, buildable base)
- Spot concealer (used sparingly for blemishes or dark spots, not for all-over coverage)
- Cream or liquid blush (for a flush that looks biological, not painted)
- Brow gel (clear or tinted, brushed up rather than filled in)
- One coat of mascara on upper lashes only
- Tinted lip oil or balm (a wash of color with shine, not opacity)
Cream and liquid formulas are preferred because they melt into skin rather than sitting on top, creating a more natural finish than powders, which can appear more like makeup when photographed. Keep that preference in mind as you shop for each item below, because texture matters as much as shade.
TL;DR:
- Using cream and liquid formulas instead of powders helps achieve a more natural, skin-like finish that is less likely to appear cakey or painted.
- Spot concealer should be used sparingly only on specific blemishes or discoloration, matched exactly to your skin tone to maintain a subtle, natural look.
- Building a minimal kit with six essential products and applying them with proper technique—such as pressing, blending, and targeting—creates a believable, effortless appearance.
- Skin preparation, including waiting a few minutes after moisturizing, and choosing the right textures are more impactful for natural makeup than shade matching alone.
- For sensitive or eczema-prone skin, selecting plant-based, fragrance-free formulas and layering skincare properly minimizes irritation without sacrificing the natural effect.
Table of Contents
- Natural Makeup Essentials: What Each Product Does and How to Choose It
- A Step-by-Step Natural Makeup Routine Using Only the Essentials
- Application Tools and Techniques That Make Makeup Look Like Skin
- Adjusting Natural Makeup for Sensitive or Eczema-Prone Skin
- Fixing the Most Common Natural Makeup Mistakes
- Key Takeaways
- Sources Worth Reading Further
- What Actually Makes a Natural Look Work
- Purelightbotanicalbeauty for a Skin-First Natural Look
Natural Makeup Essentials: What Each Product Does and How to Choose It
Building a minimalist makeup routine isn’t about owning fewer products for the sake of it. It’s about choosing the right six so each one earns its place. Here’s how to evaluate them one at a time.
1. Tinted moisturizer or skin tint
This is your base, and it should do far less work than a traditional foundation. Look for something labeled “skin-like,” “second skin,” or “blurring,” language that signals sheer, buildable coverage rather than a mask. Match it to your undertone, not just your depth of color; a tint that’s warm when your skin runs cool will sit oddly even if the shade name matches your complexion.
If your skin leans dry, mix in a drop of facial oil before applying. It extends wear and keeps the tint from grabbing onto any dry patches. Whatever you choose, treat SPF as a non-negotiable part of this step, either built into the tint or applied underneath it, since sun protection is part of skin prep, not an afterthought.
2. Spot concealer
Full-coverage concealer under both eyes and across the whole face fights against everything a natural look is trying to do. Use concealer only where you have something specific to address: a blemish, a patch of discoloration, maybe a touch under the eyes if you genuinely need it.
Match the shade exactly to your skin tone rather than sizing up to something brighter. A concealer that’s noticeably lighter than your skin reads as a highlight in the wrong place and actually draws more attention to the under-eye area than skipping it would.
3. Cream or liquid blush
Blush is where a lot of natural looks go wrong, usually from using too much powder blush applied too high on the cheekbone. Cream and liquid formulas blend into skin instead of dusting on top of it, which makes the color look like it’s coming from underneath rather than resting on the surface.
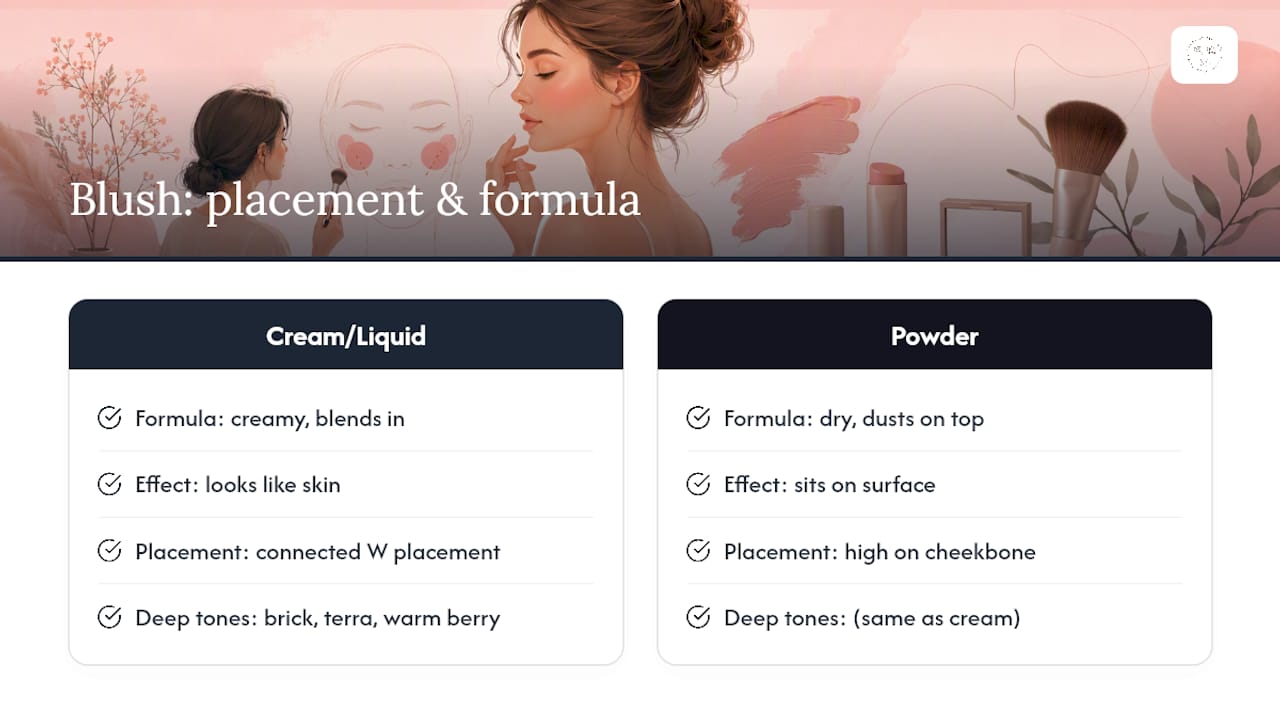
Placement matters more than product here. Stamping color in a connected “W” shape across the cheeks, up toward the temples, and lightly onto the nose bridge and chin creates what makeup artists call a connected flush, a warmth that looks biological rather than applied. Deeper skin tones tend to read well in brick, terra cotta, and warm berry; lighter tones usually do better with soft pink or peachy shades.
4. Brow gel
Skip the pencil. A tinted or clear brow gel brushed upward gives you fuller-looking brows without the blocky, drawn-on lines a pencil tends to create. If you have sparse patches, use short, hair-like strokes with a fine brush rather than filling the whole brow evenly, since even coverage is exactly what makes brows look done.
5. One-coat mascara
One coat, upper lashes only. That’s the entire instruction. A single pass opens the eyes without the spidery, dramatic effect that heavier layering creates. If your natural hair color runs light to medium, brown mascara will usually look more natural than black, which can read as harsh against fair lashes.
6. Tinted lip oil or balm
Choose a shade one or two tones deeper than your natural lip color rather than reaching for something dramatically different. Apply it to the center of your lips and blend outward with your fingertip; this “center-gloss” technique leaves the edges softer and more natural-looking than an even, all-over application.
Pro Tip: If your lips feel dry more often than not, look for a lip oil or balm formulated with plant oils. It should feel like skincare that happens to have color, not color that happens to hydrate.
Optional add-ons
A cream bronzer can add warmth along the cheekbones and jawline, but it’s genuinely optional, add it only if your face feels flat without it. The same goes for dewy setting spray: useful for locking in a fresh finish on dry-to-normal skin, unnecessary if your skin already runs oily, where it can tip a look from “glowing” into “shiny.”
A Step-by-Step Natural Makeup Routine Using Only the Essentials
Once you have the six essentials, the order you apply them in matters. Here’s the sequence that keeps everything looking like skin rather than makeup.
-
Prep first, then wait. Cleanse, apply a hydrating serum, then moisturizer. Allow moisturizer and serum to absorb for a few minutes before applying makeup; skipping this is a common cause of makeup appearing cakey or pilled. For a deeper walkthrough of this stage, prep your skin properly before moving on.
-
Apply your base in small dots. Place your tinted moisturizer or skin tint in dots across the forehead, cheeks, nose, and chin, then press it in with fingertips or a damp sponge. Pressing, not rubbing, keeps the coverage sheer instead of streaky. If you want it even lighter, mix a small amount with your leftover moisturizer on the back of your hand first.
-
Spot-conceal after your base, not before. Once the tint is on, you’ll see exactly where you still need coverage. Dab concealer only on those spots and blend the edges with a thin brush or your fingertip so there’s no visible line where it starts and stops.
-
Build your flush. Stamp cream blush in the W pattern across cheeks and temples, then tap whatever’s left on your fingers onto the nose and chin. Less is genuinely more here; you can always add a second light layer, but you can’t easily remove an overdone one.
-
Brush up your brows. A few strokes of gel, upward and slightly outward at the tail, is usually all it takes. Fill sparse areas with hair-like strokes only if needed.
-
One coat, upper lashes. Skip the lower lashes entirely for the most natural version of this look.
-
Finish and assess. If your skin runs oily, powder the T-zone only, forehead, nose, and chin, and leave the rest of your face alone. If you’re dry to normal, a light dewy mist can lock everything in without adding shine where you don’t want it. For touch-ups later in the day, blot before you add anything new rather than layering on top of oil.
Application Tools and Techniques That Make Makeup Look Like Skin
The products matter, but how you apply them changes the outcome just as much. A few technique choices separate a natural look from one that just uses fewer products but still looks “done.”
- Fingertips beat brushes for cream products. The warmth of your skin softens and melts cream formulas as you apply them, which is exactly the effect you want for a tint, concealer, or cream blush.
- A damp sponge is your backup for anything that needs more even distribution, like a tinted moisturizer across a larger area. Press it into skin in a patting motion rather than dragging or buffing, which can pull too much product off before it’s had a chance to blend.
- Cream beats powder almost everywhere except the T-zone on oily skin. Powder can flatten the very glow you’re trying to preserve.
- Build coverage in thin layers rather than applying one thick layer. A second light pass on a spot that needs it looks far more natural than trying to get full coverage in one go.
Pro Tip: After stamping your cream blush, don’t wipe your fingers clean right away. Whatever color is left on them is usually just enough to tap a soft highlight on top of your cheekbones, right above the blush, for a subtle, believable sheen. For more on keeping this kind of blending gentle on reactive skin, see how to blend makeup for sensitive skin.
Adjusting Natural Makeup for Sensitive or Eczema-Prone Skin
If your skin reacts easily, the natural makeup approach actually works in your favor, since fewer products and simpler formulas mean fewer chances for irritation. A few adjustments make it safer without changing the look itself.
- Patch-test anything new on the inside of your wrist or behind your ear 24 to 48 hours before using it on your face.
- Shop for fragrance-free formulas built around plant oils, hyaluronic acid, and peptides, ingredients that support your skin barrier rather than just sitting on it.
- Layer skincare in order and give it time. Cleanser, then serum, then moisturizer, with roughly three minutes between the last skincare step and your first makeup product. Rushing this is what causes pilling and, on reactive skin, sometimes irritation from product friction during blending.
- Favor cream and liquid textures over powders, which tend to sit more heavily on compromised skin barriers and can emphasize dry patches instead of hiding them.
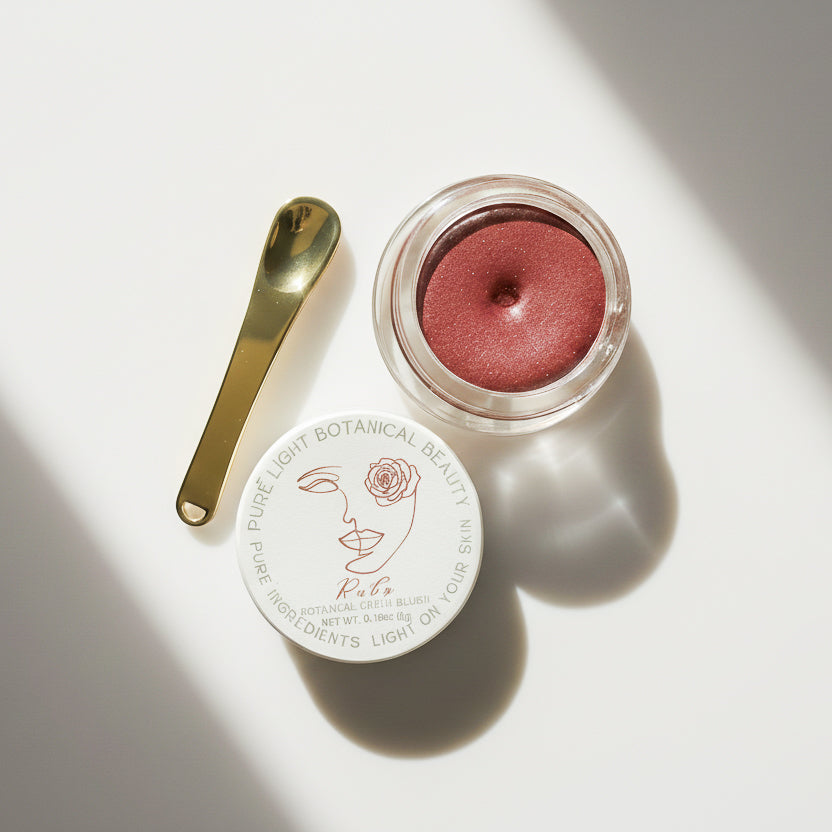
Within Purelightbotanicalbeauty’s own routine, a few products slot naturally into this framework. The Ruby Face™ Bundle simplifies the base and cheek steps into one cream-based complexion routine, which suits anyone who wants fewer decisions and fewer products touching their skin. For lips, Nourishing Lipstick™ ~ Amber offers a hydrating, skin-like tint rather than a heavy, opaque finish. And the Bamboo Hand-Mirror is a small addition worth mentioning: slowing down to actually see what you’re doing, rather than applying makeup on autopilot, tends to produce a more careful, more natural result.
Beauty that supports your skin barrier instead of fighting it isn’t a trend. It’s just what happens when the formula and the technique are both working with your skin instead of against it.
One honest note: these products haven’t undergone independent clinical testing published by a third party, and no formula, however clean, replaces a conversation with a dermatologist if you’re managing active eczema.
Fixing the Most Common Natural Makeup Mistakes
Even a minimal routine can go sideways. Here’s how to fix the most common issues fast, mid-application or mid-day.
- Over-powdered and flat: Mist your face lightly or press a damp sponge with a small amount of cream product back into the powdered areas to revive some glow.
- Under-eye concealer too bright: Blend the edges down toward your cheek with a fingertip, and add a touch of your tinted moisturizer over it to reintroduce some natural dimension.
- Brows look heavy or blocky: Lightly wet a cotton swab and gently lift the excess, then brush back up with a clean pass of gel.
- Oily T-zone by midday: Blot with a tissue first, then mist. Resist the urge to powder your whole face; keep it confined to the forehead, nose, and chin where the shine actually is.
Key Takeaways
A natural makeup look depends on skin preparation, cream-based formulas, and restrained, targeted application rather than covering the whole face evenly.
| Point | Details |
|---|---|
| Build a six-item kit | Tinted moisturizer, spot concealer, cream blush, brow gel, one-coat mascara, and tinted lip balm cover the full look. |
| Let skincare absorb | Wait about three minutes after moisturizer before applying any makeup to avoid pilling. |
| Choose cream over powder | Cream and liquid formulas blend into skin and hold up better on sensitive or eczema-prone skin. |
| Conceal only where needed | Spot-treat blemishes and discoloration instead of applying concealer across the whole face. |
| Start with Purelightbotanicalbeauty | The Ruby Face™ Bundle and Nourishing Lipstick™ ~ Amber offer plant-based, skin-like options built for this exact routine. |
Sources Worth Reading Further
A handful of beauty publications shaped the technique guidance in this article. For more detail on specific steps, see coverage from makeupartistpro on skin-first application, WhoWhatWear’s breakdowns of natural makeup ideas, Glamour’s reporting on cream product placement, and Sephora’s step-by-step guide to the no-makeup makeup look.
What Actually Makes a Natural Look Work
Most natural-makeup advice fixates on shade matching and product count, but that’s not where people actually go wrong. The real failure point is skipping skin prep and reaching for powder out of habit, even when a cream formula would serve the skin better.
The conventional wisdom to “just use less product” is only half right. Using less of the wrong texture still looks like makeup. Using the right texture, cream over powder, tint over foundation, gel over pencil, is what actually reads as skin.
If you’re starting from scratch, prioritize skin prep and formula choice before you spend money on a full kit. A single well-chosen cream blush and a patient three-minute wait after moisturizer will do more for a believable look than five extra products layered on top of dry, unprepped skin. That’s the part most guides underweight, and it’s the part worth getting right first.
— Kaitlyn
Purelightbotanicalbeauty for a Skin-First Natural Look
If everything above sounds appealing but assembling a six-item kit still feels like a project, Purelightbotanicalbeauty built its line around exactly this routine. Every formula is plant-based and designed to layer with skincare rather than sit on top of it, which matters most if your skin is sensitive, reactive, or eczema-prone and can’t tolerate trial and error with six different brands.
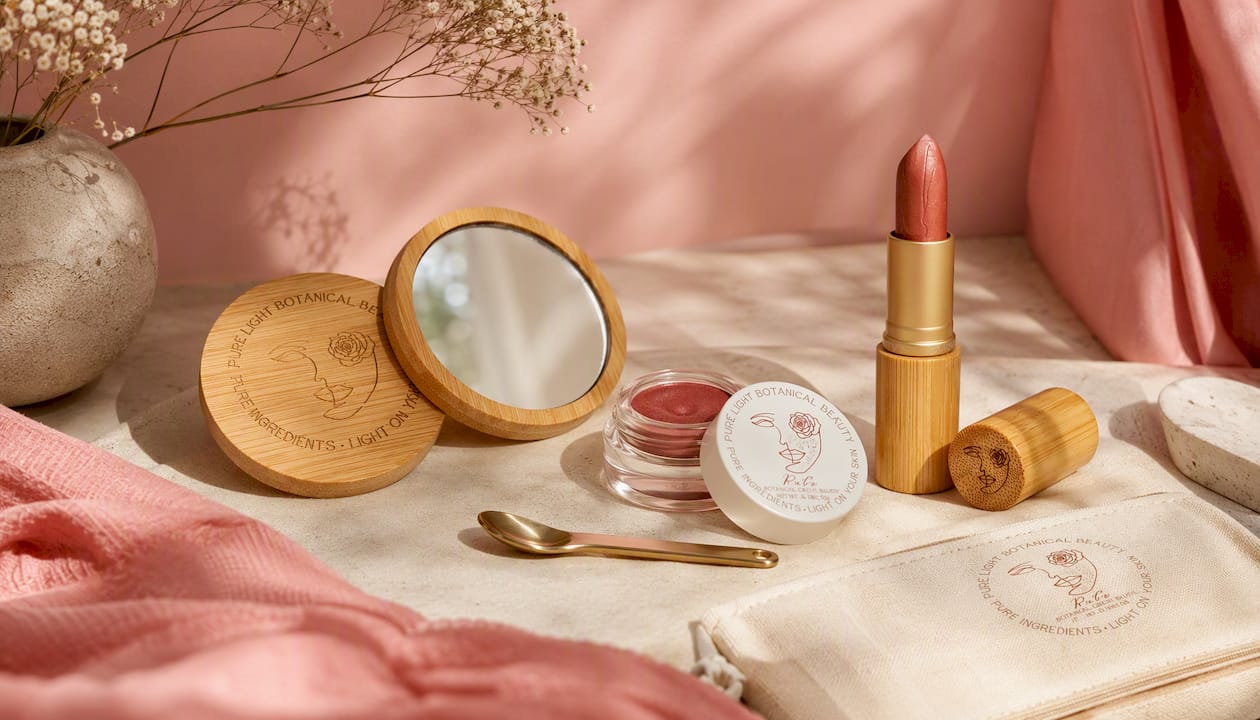
The Ruby Face™ Bundle covers your base and cheek steps in one simplified, cream-based routine, and Nourishing Lipstick™ ~ Amber gives you a hydrating, skin-like lip color that finishes the look without adding an opaque, “done” finish. For anyone who wants to slow the process down and actually see what they’re doing while they apply it, the Bamboo Hand-Mirror turns a rushed morning routine into a few unhurried minutes with yourself. Start with the Ruby Face bundle and build the rest of your kit around it at your own pace.
Recommended
- What Do You Need for a Natural Makeup Look: Easy Steps – Pure Light Botanical Beauty
- How to Switch to Natural Makeup Naturally for Radiant Skin – Pure Light Botanical Beauty
- What Is Natural Makeup Artistry? Complete Guide – Pure Light Botanical Beauty
- How to Prep Skin for Makeup Naturally and Flawlessly – Pure Light Botanical Beauty