

Cleanse, hydrate with a serum, spot-treat where needed, moisturize, apply SPF during the day, then finish with primer, that order, every time, is how to prep your skin for makeup so it wears smooth for hours instead of sliding or cracking by noon. Makeup artists have long said that prep determines how foundation looks and how long it lasts far more than the application technique itself. Skip it, and even a skilled hand with a beauty blender can’t fully rescue an uneven, dehydrated canvas.
Here’s the checklist to run through before you touch a single brush:
- Cleanse with a formula suited to your skin type (gel, cream, or gentle micellar)
- Apply a hydrating serum or targeted treatment where you need it
- Moisturize, using more on dry zones and less across the T-zone if you run oily
- Apply sunscreen as your last daytime skincare step, before any color product
- Prime last, choosing a texture that matches your moisturizer so nothing pills
Give each step a moment to settle. A rough rule: sixty seconds for a light serum, one to two minutes for moisturizer, and a full two to three minutes for sunscreen to set before primer goes on. Rushing this sequence is the single most common reason foundation looks patchy an hour after application.
Key Takeaways
The most reliable way to prep skin for makeup is a fixed sequence, cleanse, hydrate, treat, moisturize, protect, prime, adjusted by texture and amount for your specific skin type.
| Point | Details |
|---|---|
| Follow the fixed order | Cleanse, serum, targeted treatment, moisturizer, SPF, primer, always in that sequence. |
| Match texture to skin type | Cream for dry skin, gel or lightweight lotion for oily and combination skin. |
| Respect wait times | Give each step sixty seconds to two minutes to absorb before layering the next. |
| Choose primer by need | Silicone primers smooth texture; hydrating primers suit dry or dehydrated skin. |
| Keep a balm for spot fixes | Botanical Beauty Balm™ ~ Calendula & Rose hydrates flaky patches without greasiness. |
Table of Contents
- Understanding Your Skin Type Before You Prep
- The Step-by-Step Skin Prep Routine for Makeup
- Adjusting the Routine for Your Specific Skin Type
- Fixing Flakes, Redness, Texture, and Breakouts Before Makeup
- Choosing a Primer That Works With Your Skin (Not Against It)
- Don’t Skip the Eye Area
- Why Skin Prep Feels Like a Ritual, Not a Chore
- Where Botanical Beauty Balm Fits Into Your Routine
- Research and Further Reading
- Frequently Asked Questions
Understanding Your Skin Type Before You Prep
Your skin type isn’t guesswork, and it changes almost everything about what you put on before makeup. Dry skin lacks oil and often feels tight, especially after cleansing. Oily skin produces excess sebum and shows shine within a few hours, even right after washing. Combination skin gives you both stories at once, an oily T-zone with drier cheeks. Sensitive skin reacts fast, with redness, stinging, or bumps showing up soon after a new product touches it. Normal skin sits in the middle, rarely tight or greasy, forgiving of most textures.
Run a simple test. Cleanse your face, wait twenty minutes without applying anything, then check how it feels. Tight and flaky means dry. Shiny across the forehead and nose but comfortable on the cheeks means combination. Shine everywhere means oily. Any stinging or redness during the wait points to sensitive skin, and you’ll want to patch-test new products for a few days before working them into your routine.
Each type needs a different foundation underneath, literally. Dry skin needs richer hydration to prevent makeup from clinging to flaky patches. Oily skin needs lightweight, often oil-free formulas that won’t add to the shine primer is meant to control. Here’s how common skin sensations map to the textures worth reaching for:
| Skin Sensation | Best Texture Match |
|---|---|
| Tight, flaky after cleansing | Rich cream moisturizer, balm-based treatment |
| Shiny by midday, especially T-zone | Oil-free gel or lightweight lotion |
| Mixed shine and tightness | Lightweight lotion on cheeks, gel on T-zone |
| Reactive, easily irritated | Fragrance-free cream or gel, minimal ingredients |
| Balanced, few complaints | Lightweight lotion, flexible texture options |
The Step-by-Step Skin Prep Routine for Makeup
This is the sequence to follow for everyday makeup, and it holds up for special-event days too, just with a bit more time built in for active treatments to fully absorb.
- Cleanse. Use a gentle, skin-type-appropriate cleanser. If you’re wearing heavy sunscreen or makeup from the day before, a double cleanse (oil-based first, then a water-based formula) clears residue more thoroughly than one wash alone.
- Tone, if you use one. A hydrating toner or essence preps skin to better absorb what comes next, particularly useful if your skin runs dry or dull.
- Exfoliate, but only two to three times a week, never the same day as an event if your skin reacts easily. Regular, gentle exfoliation smooths texture so foundation sits evenly, but a harsh scrub right before makeup can leave skin raw and reactive.
- Apply a targeted serum. Hyaluronic acid plumps fine texture and boosts hydration before foundation, while vitamin C adds glow. Wait about sixty seconds before moving to the next step.
- Prep the eye area separately. Skin around the eyes is thinner and drier than the rest of the face, so a dedicated eye cream, applied with a light tapping motion, prevents concealer from settling into fine lines later.
- Moisturize. Use a nickel-sized amount across the face, more on dry patches, less across the T-zone if you’re oily. Give it one to two minutes to absorb before sunscreen.
- Apply sunscreen as your final daytime skincare step. Let it sit for two to three minutes so it doesn’t shift or ball up under primer.
- Prime. Choose a texture that complements your moisturizer, and apply a thin, even layer, focusing on areas where makeup tends to wear off fastest.
Morning quick routine, for the days you’re short on time:
- Splash cleanse or use micellar water
- Hydrating serum, thirty-second wait
- Moisturizer with SPF built in, two-minute wait
- Primer, thin layer
Pro Tip: Never layer more than one active ingredient (retinol, exfoliating acid, vitamin C) on the same morning you’re applying full makeup. Stacking actives increases the odds of irritation and pilling, and it’s a habit worth breaking if you want your foundation to look clean by hour three.
Adjusting the Routine for Your Specific Skin Type
The core sequence stays the same. What changes is texture, amount, and where you focus your effort.
Dry skin:
- Choose cream-based cleansers and richer moisturizers over gels
- Layer a hydrating serum under moisturizer for extra plumping before foundation
- Pick a hydrating, dewy primer, never a mattifying one, which will emphasize flaking
- Use a slightly richer eye cream to soften fine lines before concealer
Oily skin:
- Use a gel or foaming cleanser that won’t leave residue
- Apply moisturizer sparingly, and consider a gel formula over a cream
- Spot-prime the T-zone with a mattifying formula, while using a hydrating one elsewhere on the face
- Skip heavy eye creams; a lightweight gel prevents concealer from creasing
Combination skin:
- Treat zones separately, gel moisturizer on the T-zone, richer cream on the cheeks
- Use a blotting or mattifying primer only where shine shows up, blending into a hydrating formula elsewhere
- Reassess by early afternoon; combination skin often needs a light touch-up before reapplying makeup
Sensitive skin:
- Stick to fragrance-free, minimal-ingredient formulas at every step
- Patch-test any new serum or primer for several days before wearing it under full makeup
- Favor gentle, cream-based primers over silicone-heavy ones if you notice any reactivity
Acne-prone skin:
- Avoid heavy, pore-clogging creams; opt for non-comedogenic, lightweight lotions
- Apply spot treatments before moisturizer, and let them fully absorb first
- Choose an oil-free, non-comedogenic primer, and resist the urge to over-apply concealer on active breakouts
Pro Tip: If you have combination skin, keep two primers on hand, one mattifying, one hydrating, and apply each where your face actually needs it. Treating your whole face as one skin type is the most common mismatch that leads to midday shine or flaking.
Fixing Flakes, Redness, Texture, and Breakouts Before Makeup
Most last-minute skin issues have a same-day fix that doesn’t require overhauling your entire routine.
Dry patches or flakiness: Press a hydrating toner or a small amount of balm onto the area, let it sit for a minute, then gently blot excess before foundation. This is a favorite trick among makeup artists because it hydrates precisely without adding shine everywhere else.
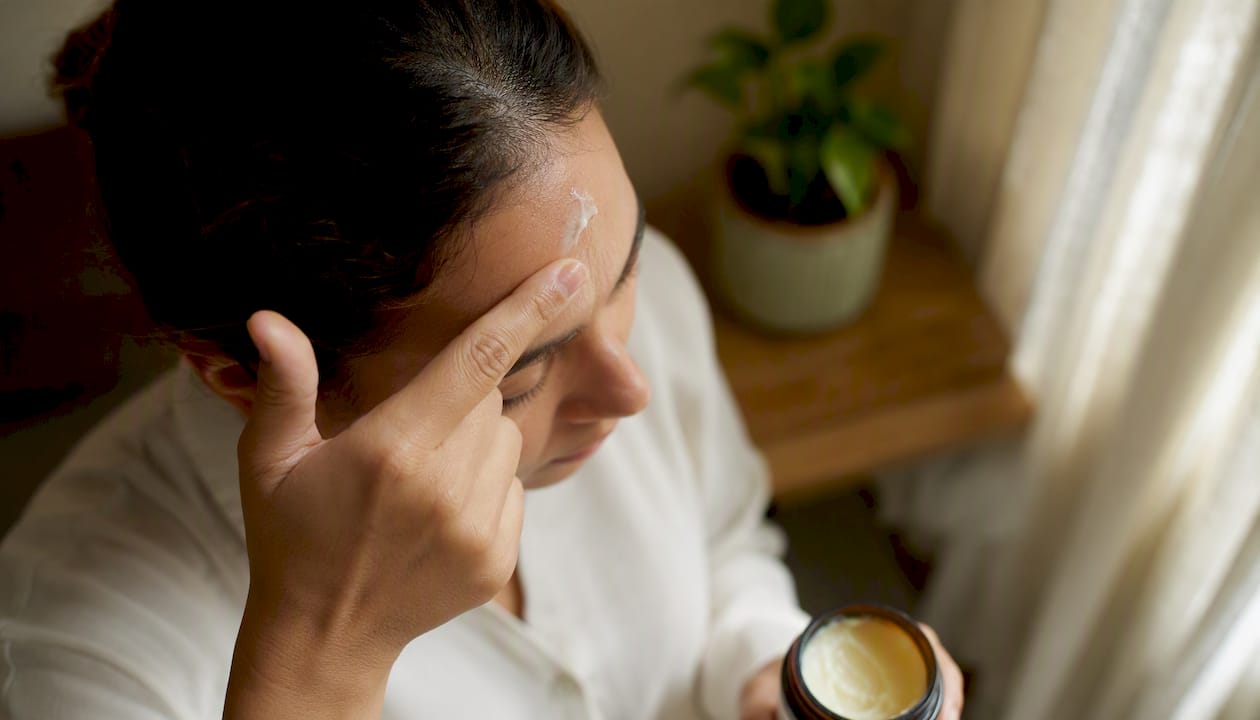
Visible texture or rough patches: A light, non-abrasive exfoliation the night before, never the same morning, smooths the surface enough for foundation to sit evenly.
Redness: A cool, damp cloth pressed to the area for thirty seconds before moisturizer calms visible flushing, and a green-tinted primer can neutralize what’s left without heavy coverage.
Active acne: Don’t over-exfoliate around inflamed breakouts. Pat, don’t rub, when applying products nearby, and let spot treatments fully dry before layering concealer, which prevents the concealer from sliding off the treated area within an hour.
Large pores: A silicone-based, pore-blurring primer applied in thin layers works better than a thick single application, which can actually settle into pores and look worse.
Pro Tip: Keep a hydrating balm at your vanity specifically for flaky patches around the nose and brow bone. A tiny dab, pressed rather than rubbed, hydrates without turning the surrounding skin greasy, a trick worth using before any high-coverage makeup day.
Choosing a Primer That Works With Your Skin (Not Against It)
Primer is the last decision point before makeup, and it’s where most compatibility problems show up. Silicone-based primers are the go-to choice among makeup professionals for smoothing texture and creating a surface foundation can glide over. But they aren’t universal. Dry skin often does better with a hydrating, lightweight primer, since silicone formulas can emphasize dehydration lines rather than hide them.

Pilling happens when textures fight each other, usually because moisturizer and primer share incompatible bases (a heavy oil-based cream under a silicone primer, for example). Layering emollients that don’t match, or applying too much product too fast, is the most common cause of that rolling, clumping texture under foundation.
Run this quick compatibility check before big makeup days:
- Test your moisturizer and primer combination on the back of your hand first, waiting a minute to see if they blend smoothly or ball up
- Wait a full two minutes after moisturizer before applying primer, giving it time to absorb rather than sit on the surface
- Use a thin layer of primer, more product doesn’t mean better hold, it usually means more pilling
- If you’re switching to a new moisturizer, test it under your regular primer before wearing the pairing on an important day
Pro Tip: Apply primer with clean fingers or a damp sponge instead of a brush. The slight warmth from your hands helps it melt into skin rather than sitting on top, which reduces the pilling that brushes can sometimes cause by pushing product around rather than pressing it in.
Don’t Skip the Eye Area
The skin around your eyes is thinner, drier, and moves more than anywhere else on your face, which is exactly why it needs its own step rather than getting whatever’s left over from your regular moisturizer.
Apply eye cream with your ring finger, using a light tapping motion rather than dragging or rubbing, which can pull at the delicate skin over time. Wait about a minute before concealer goes on. If you skip this step, concealer tends to settle into fine lines within an hour, a problem commonly called “creasing” that no amount of setting powder fully corrects.
For dry under-eyes, a slightly richer eye cream helps concealer sit smoothly rather than clinging to dry patches. For oily or combination skin, a lightweight gel formula prevents the area from feeling heavy or shifting by midday. If puffiness is a regular issue, a cool roller or chilled eye cream applied a few minutes before makeup can reduce it enough to change how concealer sits.
Why Skin Prep Feels Like a Ritual, Not a Chore
At Purelightbotanicalbeauty, we’ve always believed that the minutes before makeup matter as much as the makeup itself. Skin prep isn’t a technical checklist to rush through, it’s a small act of care, a pause where you’re tending to your skin’s actual needs rather than covering them up. That’s the philosophy behind every formula we make: plant-based ingredients that support the skin’s barrier and calm sensitivity, so the routine you follow before makeup is also doing quiet work underneath it.
This matters most for anyone managing sensitive skin or conditions like eczema, where the wrong texture or a synthetic fragrance can undo an otherwise careful routine in minutes. Choosing gentle, calm and clean sensitive skin steps isn’t an extra precaution, it’s the foundation the rest of your routine depends on. When your skin feels supported rather than stressed, makeup stops being something you apply over a problem and becomes an extension of skin that’s already doing well.
Where Botanical Beauty Balm Fits Into Your Routine
If you’ve read this far, you already know the moments where prep tends to fall apart, a flaky patch by the nose, a dry spot that won’t take foundation smoothly, an eye area that needs a little more than your regular moisturizer offers. That’s exactly the gap the Botanical Beauty Balm™ ~ Calendula & Rose is built to fill.

Formulated with calendula and rose, this balm is designed for precisely the same-day fixes covered above: a thin press onto a dry patch, a touch along the brow bone, a moment of barrier support before primer goes on. Its plant-based, calming formula makes it a fit for sensitive skin and anyone managing eczema-prone areas, without the heaviness that can throw off primer compatibility. Used sparingly, it hydrates the spots that need it most without tipping your whole routine toward greasy.
If you’re ready to build prep into an actual ritual rather than a rushed step before makeup, start with the Botanical Beauty Balm™ ~ Calendula & Rose and see how it fits into the sequence above. For the full product range and more on the philosophy behind it, visit Purelightbotanicalbeauty.
Research and Further Reading
- Understanding skin types — , Cleveland Clinic, useful for confirming how dry, oily, combination, and sensitive skin behave differently and why that changes product choice.
- How to prep skin before make-up, according to the experts — , Marie Claire UK, the primary source behind the step-by-step routine, primer selection guidance, and pilling prevention advice in this article.
- How Makeup Artists Prep the Skin for Makeup — , Skincare.com, background for the same-day corrective techniques covered in the concerns section.
- Understanding the role of natural moisturizing factor in skin hydration — , Practical Dermatology, explains the barrier science behind why certain moisturizer textures improve makeup wear while others feel heavy or greasy.
Frequently Asked Questions
How long should I wait after moisturizer before applying makeup? Give moisturizer one to two minutes to absorb before primer. If you’re using an active serum first, wait about sixty seconds before moisturizing.
Can I skip primer if I moisturize well? Moisturizer hydrates, but primer creates the smooth surface foundation grips onto and extends how long makeup lasts, so skipping it usually means faster fading or shine breakthrough.
What’s the best way to prep oily skin for makeup? Use a gel-based moisturizer, apply it sparingly across the T-zone, and finish with a mattifying primer only where shine shows up, keeping a hydrating primer for the drier areas of your face.
How do I stop my foundation from looking patchy on dry skin? Layer a hydrating serum under a richer moisturizer, wait the full absorption time, and choose a dewy, hydrating primer instead of a mattifying one.
Is it okay to exfoliate the same day as a big makeup event? Gentle exfoliation the night before works better than the same morning, especially if your skin reacts easily, since same-day exfoliation can leave skin raw under foundation.
Recommended
- How to Prep Skin for Makeup Naturally and Flawlessly – Pure Light Botanical Beauty
- Sensitive skin makeup: calm, clean steps for radiant results – Pure Light Botanical Beauty
- What Do You Need for a Natural Makeup Look: Easy Steps – Pure Light Botanical Beauty
- How to Switch to Natural Makeup Naturally for Radiant Skin – Pure Light Botanical Beauty